The cecTalker V-by-One model [White] has the input/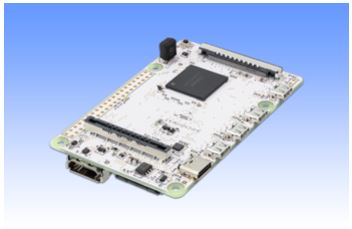 output terminals for HDMI and V-by-One on the main-board.
By connecting it to a sub-board for UI extension, it is possible to switch modes and display the status.
Buy "cecTalker" sample now on Chip1Stop.com |
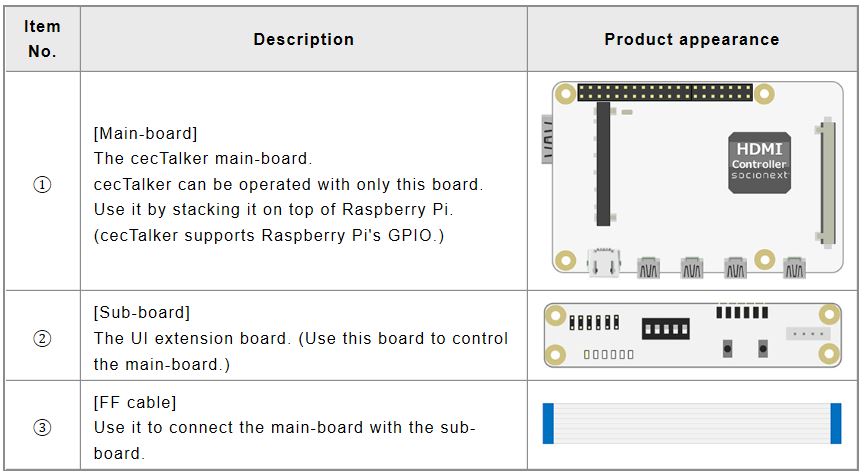
Product Appearance
- Main Board
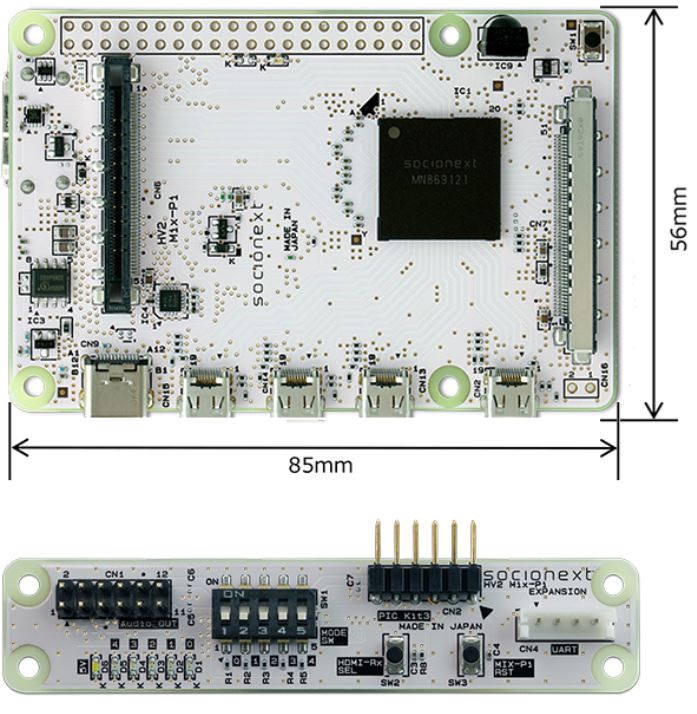
Sub board (for UI)
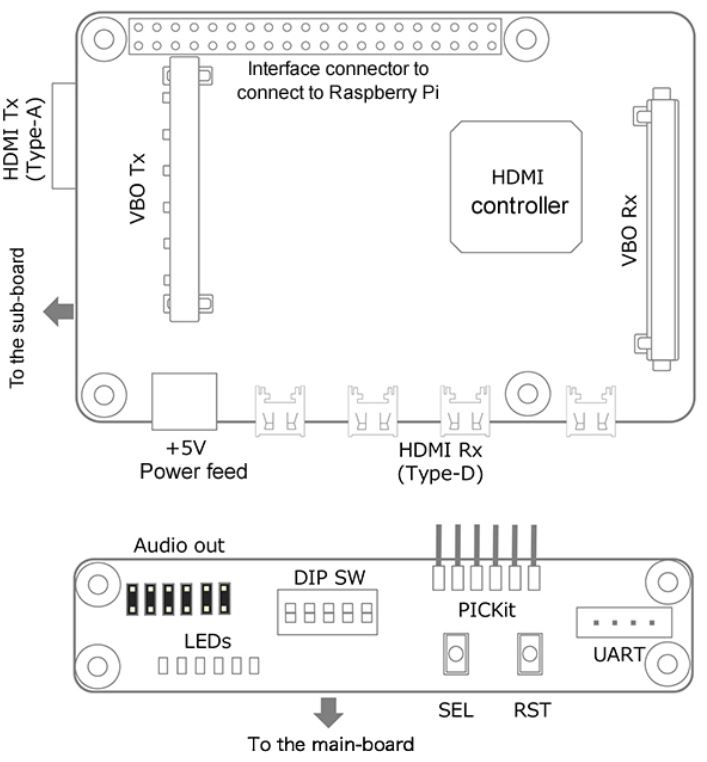
Parts Placement Diagram
Product Specifications
| Purpose | Prototype/Development/Testing | ||
| Function | HDMI to V-by-One conversion function V-by-One to HDMI conversion function 4 to 1 HDMI input selection function 2K/4K low-latency super-resolution function |
||
| Interface | HDMI | Rx | 4 ports (Connector: Type-D) |
| Tx | 1 port (Connector: Type-A) | ||
| CEC | Support for customization | ||
| ARC | - | ||
| V-by-One | Rx | 1 port | |
| Tx | 1 port | ||
| I2S | Rx/Tx | 2 ports (for Raspberry Pi and a sub-board) | |
| UART | Rx/Tx | 2 ports (for Raspberry Pi and a sub-board*) | |
| Power supply | 5V/1.5A (Connector: USB Type-C) | ||
* : Main or Sub Exclusive
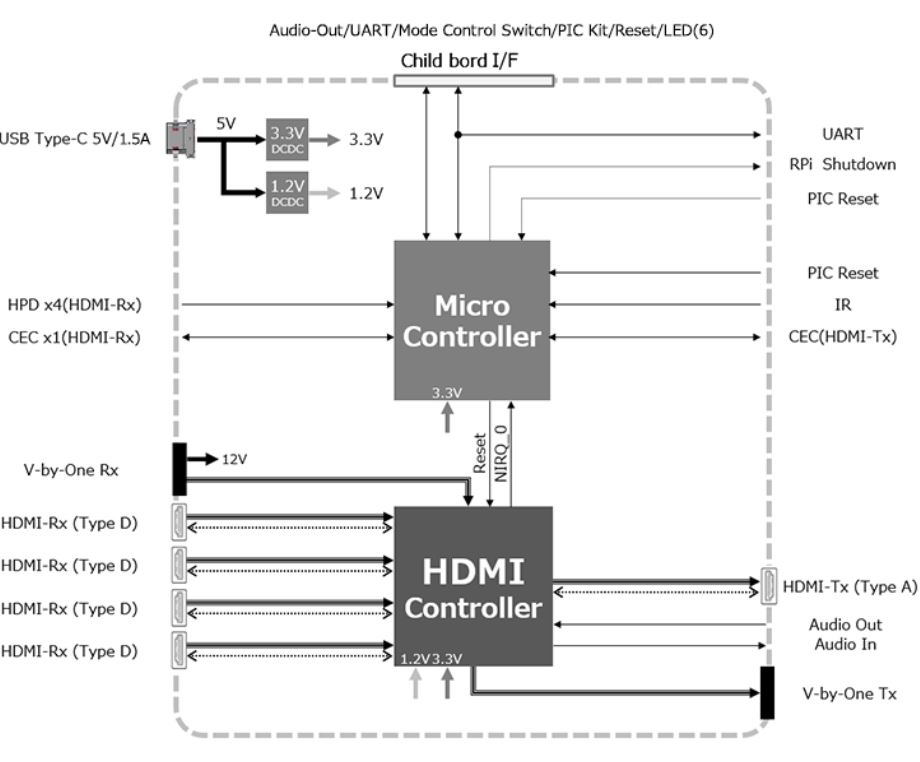
Block Diagram
Product Contents
Items included as part of the product package are:
- cecTalker V-by-One model [White] main-board,
- sub-board,
- FF cable.
Note:
The AC adapter and HDMI cable, and V-by-One cable are not provided as part of the package
The AC adapter and HDMI cable, and V-by-One cable are not provided as part of the package
Equipment Requirements for Operation of Module
| ① AC adapter (5V 1.5A) | Connect it with the main-board using the USB Type-C connector. |
| ② HDMI cable (Type-A/Type-A) | Use this cable to connect the main-board and the monitor. (It is not required for V-by-One output.) |
| ③ HDMI cable (Type-A/Type-D) | Use this cable to connect the main-board with the source device. (Up to four cables can be connected.) |
| ④ V-by-One cable | Use the cable as needed. |
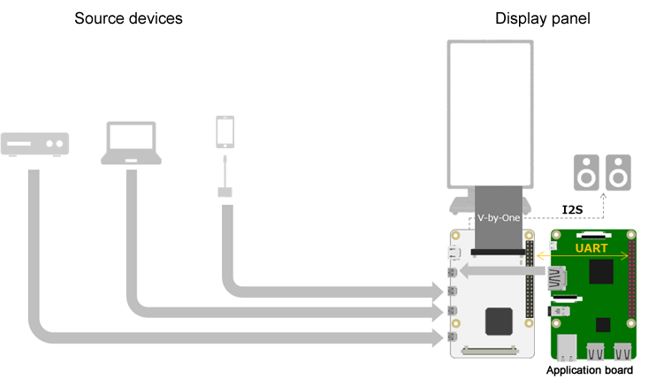
Simple Application
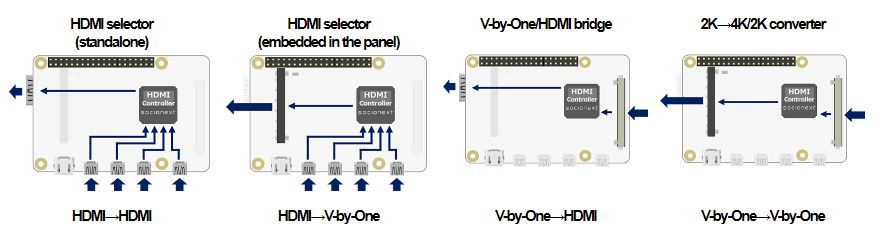
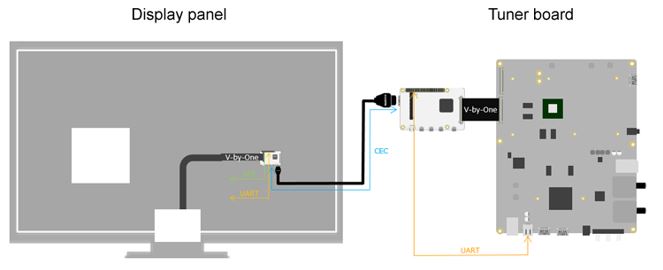
System Applications
TV software development and evaluation/test jigs

Two-piece TV set
Digital Signage